Taking advantage of the fact that we have returned from vacation and that we are still used to go barefoot and take off our shoes, we have made paper mache shoes with the children.
To do them we have looked for a technique that was simple and practical and that young children could also do.
How to make Paper Mache?
Here is a list of the material you need. You better have it ready before you start.
Material :
- Plastic bag
- Painter’s zeal
- Newspaper or recycled paper
- Kitchen paper
- White glue
- Water
- Tempera paintings
- Varnish
- Piece of cardboard to make the sole
- Glue brushes
- Tempera Paint Brushes
- For the decoration you can put: eyes, hearts, pom poms, tissue paper, etc …
This activity is done in two parts and days to let the Paper Mache dry.
First part:
To make the shape of your foot, relax and draw the shape of your foot on the cardboard . You better make it a little bigger because then when you put the paper you can make the shoe small.

Then put the foot inside the bag and the cardboard under the foot . The idea is to make the shape of your foot with the sole. So now you can take painter’s jealousy and start wrapping your foot with jealousy , above the bag.
So:

Gradually, you will notice how your foot is subject . Put the zeal where you want to make the shoe, you can leave open behind or in front, you can make sandals….

Make decide how you want it to be, so now we are going to design the shoe!!!
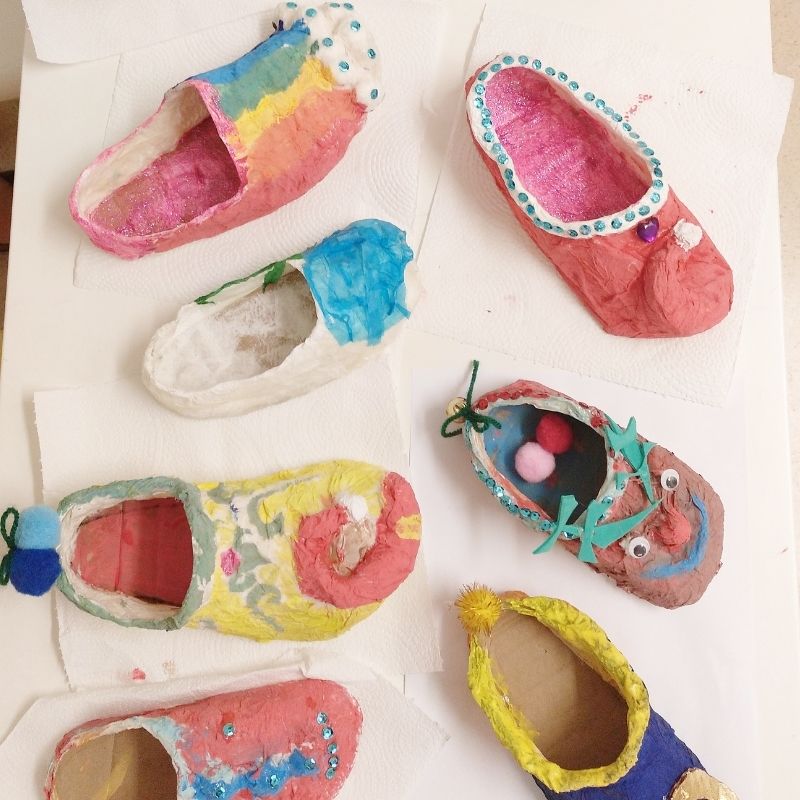
Here are some examples of different designs … Create yours!


When you have finished shaping the shoe, remove the foot from the inside and you will see how you already have the shape you want as a base to start putting the paper.
If you have put a lot of zeal, you still have time to cut and design the shoe. Elia cut it and left it like this:

Maché paper:
There are different ways to make Paper Mache.
You can do it with different types of paper: newspaper, recycle paper , kitchen paper, etc …
We have taken the roll paper that they sell in Ikea because we use it a lot in the Creata Saleta . But don’t worry, any kind of paper is going well.
Split the paper into small pieces of different sizes, some larger for the base and smaller ones for more details. You have to have some preparations before you start, then you can cut them on the fly, as it suits you.
So:

Put white glue mixed with water (not much water) in a container and with a brush you see applying the glue and on top of the paper clippings.
The paper must be soaked as you put layers.
You have to put several layers until you see that it is already resistant and that it has form.
For the last layers and to make the details, we have used paper towels .
This paper is easier to mold and serves to make details such as pom poms, eyes, mouths, etc …
Below you can see some details made with kitchen paper:

When you’re done, you have to let it dry, you usually need one day.
Second part :
Once you have it dry, you can Start Decoring the Shoe !!
You can paint it with Temple paintings or with Acrylic paint .
Warning! If you use acrylic paint and stains, it does not go to wash it.
We have chosen to paint with Temple Paintings.
Paint the shoe to your style, now that you have done it, enjoy putting the colors you like best and if you want you can decorate it with eyes, hearts, pompoms, bows, tissue paper etc …
This part is very entertaining. The children have enjoyed a lot making their own designs, each according to their style.
Some designs you can see here:


Let it dry and if you want, so that the color rises, you can varnish it with spray.
This activity is very beautiful to do since you will keep a shoe of your foot when you grow up. In a few years you will see how your little foot was and how you designed it.